
Setting up the EV-ACS3210E is a sequence, not an installation: check the box, plug into a suitable socket, pair the app once, set the current to match your supply, plug into the car, and confirm the session in the app’s energy monitoring. Two decisions matter: the socket and the current. Everything else is order.
Key Takeaways
- Setup is a sequence: box check, pairing, a current matched to the supply, first session.
- Pair the app before charging — the setting and the session record live there.
- Start at 10 A on an unconfirmed supply; step up only when the circuit is known.
- Confirm the first session twice: the energy counter moving, and a cool plug after a few minutes.
Out of the Box: Check Before You Plug In
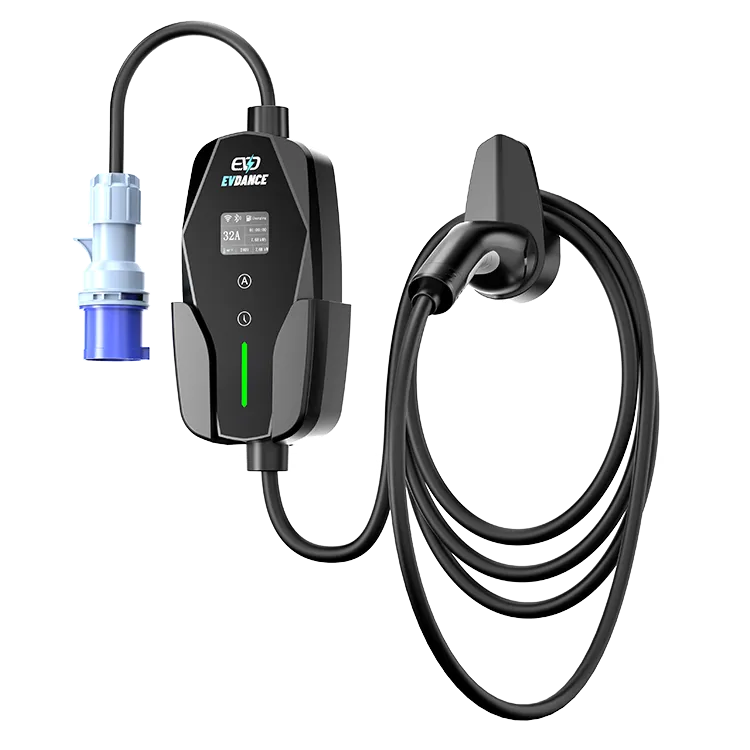
- Match the box to the manual. Check contents against the packing list; anything missing or damaged goes to the seller before the first session, not after.
- Inspect the unit, then read the manual’s safety pages. Cable, plug and connector: no crushed sections, bent pins or cracked housing — transit damage is easier to resolve before first use. The safety pages carry the handling rules.
- Confirm the plug matches your market. The fitted plug depends on the version supplied for your market; check it against your socket beforehand.
Pair the App Before the First Session
On this unit the app is not decoration — the current is set in it, and its monitoring confirms sessions. Pair it once, before the first charge, following the app’s prompts and the manual. One honest note: a scheduling timer is not a stated line on this model’s specification, so check the app and manual if you plan to rely on one; if there is no timer, the car itself can usually hold the window instead.
Your First Current Setting
The charger adjusts between 10 A and 32 A. Choose by the supply, not by what the car can take — charging from a normal socket is a low-setting job; the top setting belongs on a circuit installed for continuous charging:
| Setting | Power at 230 V | Where it belongs |
|---|---|---|
| 10 A | About 2.3 kW | An ordinary household socket — the safe default anywhere |
| 13 A | About 3.0 kW | The top of the household-socket class |
| 16 A | About 3.7 kW | A commando socket, or a household circuit with real headroom |
| 32 A | About 7.4 kW | A dedicated circuit built for continuous charging |
Unknown supply? Start at 10 A and have it confirmed before stepping up — a low first session still proves everything works.
The First Session, Step by Step
- Plug the charger into the socket and confirm it has power, per the manual’s indication.
- Open the app and set your chosen current.
- Plug the Type 2 connector into the car until it seats fully, the 7.5 m cable on a relaxed route.
- Watch the app. The session should show as running, the energy figure counting up — that counter confirms the monitoring works too.
- Check again after a few minutes. Session steady; plug and socket no more than mildly warm.
- To finish: end the session as the manual describes, unplug the car first, coil the cable loosely.
If the First Session Does Not Start
- No power at the unit: check the socket’s breaker or fuse first.
- Unit on, car idle: reseat the connector fully, then check the car for a charge limit or schedule holding it back.
- The app does not show the charger: run the pairing again as the manual describes.
- Anything hot, discoloured, or smelling of hot plastic: stop, unplug, have the circuit checked. Our portable charger safety guide covers the stop signs.
The Charger in This Walkthrough
The EV-ACS3210E is a 32 A Type 2 portable charger: single-phase, about 7 kW at its top setting, adjustable from 10 to 32 A, with app control, energy monitoring and OCPP-readiness, an IP66 enclosure and a 7.5 m cable, made by EVDANCE (Shenzhen, founded 2011) with a 3-year standard warranty. Portable units in general: see our guide to whether portable EV chargers work.
Frequently Asked Questions
Do I need an electrician to set up a portable charger?
Not to plug into an existing, suitable socket — that is the point of a portable charger. You need one if a socket or circuit must be added, changed or repaired.
Which setting should the first session use?
The one matched to your supply: 10 A or 13 A on an ordinary household socket; 32 A only on a circuit installed for continuous charging.
Can I charge before pairing the app?
On this unit the current is set in the app, so pair first — otherwise you cannot confirm the setting the session will run at.
Related Reading
- Do Portable EV Chargers Work? How Speed Depends on the Outlet
- What Is a 7kW Portable EV Charger? Speed, Range, and Compatibility Explained
- Can I Charge an Electric Car From a Normal Socket?
- Portable EV Charger Safety Guide 2026: NEC Rules, Extension Cords, and What to Avoid