
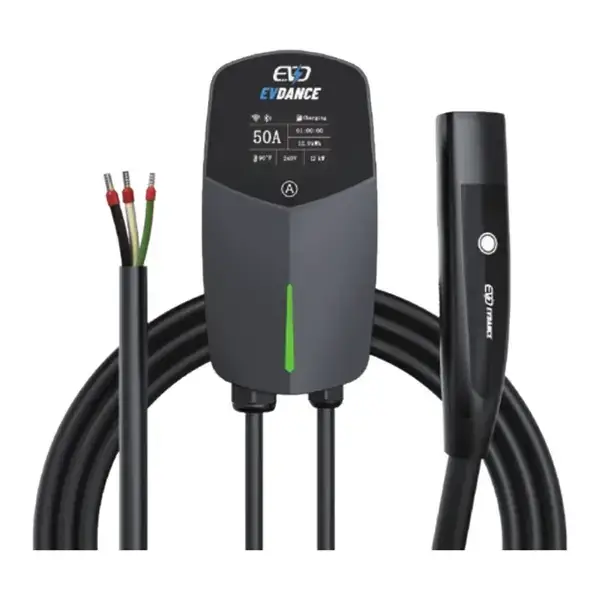
Installing a Level 2 EV charger means adding a dedicated 208–240 V circuit, sized at 125% of the charger’s current, and either a NEMA 14-50 outlet or a direct hardwired connection. In most places the work needs a licensed electrician and an electrical permit. This guide sets out the steps in order, the circuit sizes for common chargers, what drives the cost, and what installers should check before they quote.
Key Takeaways
- Start with a load calculation: the panel must have spare capacity for a continuous EV load.
- Circuit = 125% of charger current: 32 A → 40 A, 40 A → 50 A, 48 A → 60 A.
- A NEMA 14-50 outlet supports up to 40 A charging; 48 A and above must be hardwired.
- Most jurisdictions require a permit and inspection; use a licensed electrician.
- Choosing a charger with adjustable current lets one model fit the circuit each site can support.
Step-by-Step: How a Level 2 Charger Is Installed
- Check the panel. The electrician runs a load calculation to see whether the service (often 100 A or 200 A in homes) can carry an extra continuous load. If not, options are a lower charger setting, load management, or a panel/service upgrade.
- Choose the charger and current. Match the charger rating to the circuit the panel can support. Adjustable chargers can be set down at commissioning.
- Pick the location. Close to the parking position, within reach of the cable (25 ft is common), and as close to the panel as practical to shorten the cable run.
- Pull the permit. Requirements vary by city and state; see do you need a permit to install a home EV charger.
- Install the circuit. Double-pole breaker, correctly sized conductors and, for a plug-in unit, a heavy-duty NEMA 14-50 receptacle (GFCI protection rules apply to outlets in many areas).
- Mount and connect the charger. Wall-mount per the manual, then plug in or hardwire.
- Commission. Set the maximum current to match the breaker, connect Wi-Fi or the app if used, and test-charge a vehicle.
- Inspection. The inspector signs off the work where a permit was required.
For mounting details, see how to install a wall-mount EV charger.
Circuit Sizing for Common Level 2 Chargers
| Charger setting | Breaker | Connection | Typical use |
|---|---|---|---|
| 16 A (3.8 kW) | 20 A | Hardwired or plug-in | Small panels, long commutes not needed |
| 32 A (7.7 kW) | 40 A | Hardwired or NEMA 14-50 | Most homes |
| 40 A (9.6 kW) | 50 A | Hardwired or NEMA 14-50 | Homes with spare capacity |
| 48 A (11.5 kW) | 60 A | Hardwired only | Larger panels, cars with 11 kW+ onboard chargers |
The reason these numbers line up is explained in the circuit ladder behind 40 A and 48 A chargers. Conductor size depends on the run length, wire type and local code — the electrician decides. US installations follow NEC Article 625; for other countries see NEC, BS 7671 and AS/NZS 3000 compared.
Plug-In or Hardwired Installation?
A plug-in charger on a NEMA 14-50 outlet is simple to replace and can move with the owner, but it limits charging to 40 A. Hardwiring removes the outlet as a point of wear and is required for 48 A and above. Many installers prefer hardwiring for daily-use chargers for that reason.
What Drives Installation Cost
- Distance from panel to charger, and whether the cable runs through finished walls
- Panel capacity — a service upgrade is the largest single cost when needed
- Outdoor mounting, trenching or conduit to a detached garage
- Permit and inspection fees
- Local labour rates
For more detail, see EV charger installation cost factors and how much electricians charge.
For Installers: What to Check Before You Quote
- Panel rating, existing load and free breaker spaces
- The customer’s car and its onboard charger rating — this sets the useful charger size
- Indoor or outdoor mounting, and the enclosure rating needed
- Whether the customer wants app control, scheduling or a second charger later
- Which charger you will supply, and its manual and wiring diagram
See also what an installation quote should include and our EV-ACT5006T job-site checklist. Installers buying in volume can compare wholesaler, distributor or direct supply.
Chargers Installers Fit Most
| Model | Install type | Current | Connector |
|---|---|---|---|
| EV-ACT4001T / U | NEMA 14-50 plug, 50 A breaker | 6–40 A adjustable | NACS / J1772 |
| EV-ACT5002T / U | Hardwired, 240 V | Up to 50 A | NACS / J1772 |
| EV-ACT5006T | Hardwired or NEMA 14-50P | 48 A / 50 A max | NACS |
Installer and distributor pricing is available for sample, small-batch and OEM quantities — see the OEM & ODM page or all models.
Frequently Asked Questions
Can I install a Level 2 charger myself?
Mounting the unit is simple, but the new circuit is electrical work that most jurisdictions require a licensed electrician and permit for. Using one also protects your insurance and warranty.
How long does installation take?
A straightforward garage install near the panel is often done in a few hours. Long cable runs, trenching or a panel upgrade take longer.
Does a Level 2 charger need a dedicated circuit?
Yes — see our explainer.